Showing posts with label Fine motor fun. Show all posts

Tuesday, January 27, 2015

Busy Bag Exchange


Have you hosted or participated in a busy bag exchange before?  I never had, but wanted to try it out!  I am part of a pretty active mom's group, and we do most of our communications on Facebook.  So I posted, asking if anyone was interested in doing a a swap, hoping maybe 8-10 moms would be interested.  To my surprise, 17 moms indicated interest!

To keep it organized, I created a Google doc with all the participants names and what activity they were bringing.  I also wrote a few guidelines.  Some of the ideas for guidelines came from Second Story Window.  Here are the guidelines for our swap:

  • Please put your items in a ziplock bag and label the outside with the name of your activity.
  • Please include a set of directions in your bag.  Even if it seems really self explanatory, please write a sentence or two description on how it can be used.
  • Please keep the cost of each bag around $1 or under.
  • You do NOT need to laminate any papers included.  If possible, print any papers on cardstock so they will last.
  • Put together the quality kind of bag you would want to receive in return. This is really important to remember! Of course we want to be cheap but we also want the activity to hold up to toddler use.
  • If you cannot attend our swap night, please give your bags to me or another participant before the swap night.  We will include your bags in the swap and get your new activities to you!

How did it turn out?  It was a huge success!  All the moms were excited to participate.  16 moms sat around my living room on a Saturday morning, enjoying some time catching up and exchanging a variety of activities!

I was so pleased with the variety of activities and the quality of the bags!  Here are the bags that were swapped!

Animal counter sorting using tweezers
Button lacing and number practice from See Vanessa Craft
Clothespin color matching from Rookie Mom
Make a felt pizza
Copying shapes and patterns with yarn on felt from Momtastic
Wiffle ball lacing and weaving from See Vanessa Craft
Fish and frog sorting and patterning
Pom pom push
Lacing cards
Velcro craft sticks to make shapes and letters
Button snake from Motherhood on a Dime
Counting with googley eyes
Clothespin number wheel from Money Saving Mom
Shape memory from Delighting in Today
Felt roads
Crazy straw weaving from Powerful Mothering
Make a felt sandwich
Caterpillar counting from Powerful Mothering
If you have been thinking about hosting or participating in a busy bag swap, I highly recommend it!

To see more busy bag ideas, check out my Pinterest board.

Sunday, January 19, 2014

3 Buttoning Activities

Little Guy has been fascinated with buttoning lately.  Anytime he sees a button, he wants to try it out.  So, I thought I would make some buttoning practice for him, so he could be successful with it!

Since we are in winter, we started with a snowman.  I saw the idea on H is for Homeschooling.  This activity also practices snapping, as there is a snap on the hat and on the scarf.  As you can see, this one was a big hit!
To go along with the snowman, we have been practicing the letter S.  So I made an S out of felt with 5 buttons.  Little Guy had to match the colors to the buttons and then button them on.  All the pieces of felt are also different shapes, to give us more to talk about as he is working.  I hot glued the S to a piece of cardboard.  This did make some of the buttons difficult to do, as there is no movement or give in the S.  Little Guy enjoyed it none-the-less! 
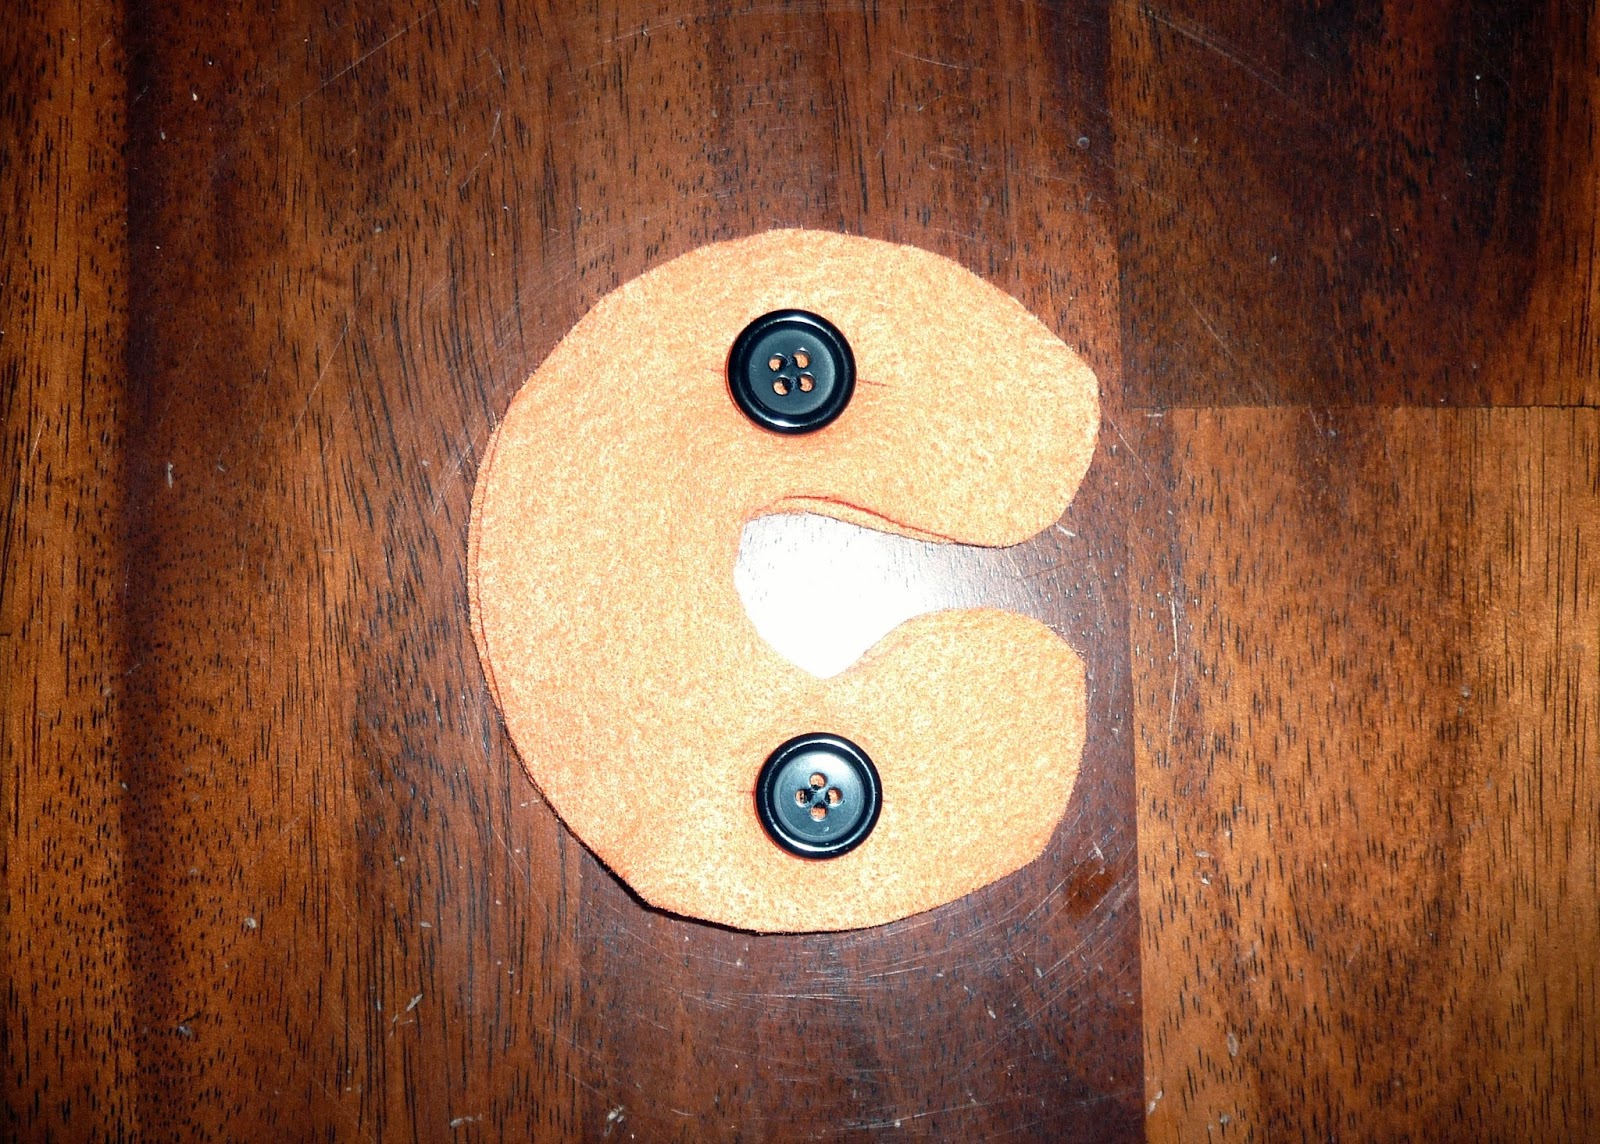
The last activity isn't quite finished yet.  It will be name buttoning practice.  I cut out the letters of his name, twice for each letter.  One of each letter will have two buttons, and the other will have the two button holes.  He will match the letters of his name up and practice buttoning!
I made all my buttoning practice activities out of felt, since it doesn't fray and provides a little thickness for Little Guy to hold onto.

How are you practicing buttoning?

We linked up to School Time Snippets!

Tuesday, November 19, 2013

Tot School- Fall Week 2

This week we had week two of our fall theme. We stayed pretty busy with the variety of activities we had.  Several activities this week were fine motor skills.  There were several activities that Little Guy really seemed to enjoy, and two that helped to decorate my house! Little Guy is 28 months old.


The first tray was filling in an outline of a leaf on contact paper. He had red and orange tissue paper squares to stick in the shape.  About halfway completed, he said he was all done, so I had him put 7 more squares on. This was a great way to get a few more squares on and practice counting.
Look at my leaf!
We were able to play Roll a Leaf from the leaf pack at 3 Dinosaurs this week.  Whenever he rolled an object, he would put a sticker on the chart to mark it. This was a fun game!
Putting on stickers to show what I've rolled!
The next tray turned into one of Little Guy's favorites. I bought little wooden wheels (found them at the thrift store for $1!) and painted them fall colors.  I added a shoelace with a knot at the end.  Little Guy enjoyed putting the circles on and making snakes. He made snakes multiple times!  Usually, I leave our "work" items to only by used during our Tot school time.  But since he enjoyed this so much, it came out several other times.
Working hard to thread the circles.
The button snake also came out this week. Every time we get it out, Little Guy gets a little better at buttoning.

He also did a leaf shadow match. This activity came from the fall pack at Homeschool Creations.  I had cut apart the colored leaves and left the shadow sheet whole. Little Guy matched the leaf to its shadow. Every time he did it, he got a little better and a little faster.
Which leaf is this?
The next activity was another favorite. This activity is also from Homeschool Creations.  He had to clip the clothespin to the section of the wheel with the corresponding number. He does a great job of counting to 3, so counting to 6 is great practice. He also really likes using clothespins!
There are two scarecrows.
The next activity was one of my favorites. I got this idea from Happily Ever Mom. I cut 3 toilet paper tubes into quarters then stapled each of these rings into a wreath. Using a variety of fall colored ribbons, Little Guy had to weave the ribbons in and out of the tubes. This was the first time I had done weaving with him.  I found it best to hold the wreath for him to help him weave the ribbons.  I think his finished wreath is quite nice!
Starting to weave the wreath.

Our completed wreath.
Another way he practiced some fine motor skills this week was lacing leaves.  I had bought these foam leaf shapes from Target.  I punched holes all around the edges and tied on a shoelace.  Little Guy then had to lace all around the edge.  He was more successful if I held the leaf for him as he laced.  I was surprised at how many times he chose to do this activity.
The last tray was a nine piece puzzle from the fall pack at 3 Dinosaurs.  Little Guy really enjoys completing puzzles, so this was a good activity for him.  The hardest part for him is that since the puzzle pieces are simply paper, they can be put over one another, and since there is no frame, they move around easily.  However, that did not stop him from completing the puzzle several times during the week.
Next week we will include some Thanksgiving themed activities in our trays.  What are you working on right now?

Thursday, October 24, 2013

Pumpkin Themed Tot Trays

These are the Tot Trays that I am using with Little Guy this week.  Here's a sneak peek at them, check back next week on my Tot School post to see if Little Guy liked these trays!

1. Coloring pages from 1+1+1=1.

2. Farm puzzles (leftover from our farm unit, but still highly enjoyed!)

3. Pumpkin decorating with foam pumpkin, tacks, and buttons.  Using the tacks, your toddler can decorate a foam pumpkin with buttons.  (I picked up the pumpkins at the dollar store.)

4. Pom-pom transfer with a pumpkin shaped ice cube tray and pom-poms. Using tongs or a clothespin, your toddler can move the pom-poms in and out of the ice cube tray.

5. Leaf grabbing.  Using tongs or a clothespin, your toddler can move the foam leaves in and out of the pumpkin bucket.

6. Button snake with leaves.  Each foam leaf has a slit in it.  The ribbon has a large button sewn on the end.  Your toddler can "button" the leaves onto the ribbon.

7. Pine cone decorating.  Using materials such as sequins, stickers, and pipe cleaners, your toddler can decorate a pine cone.

8. Dot pages.  Using dot makers, your toddler can complete the dot pages from the Pumpkin Pack 2 at 1+1+1=1 and the Pumpkin Pack from 3 Dinosaurs.

What pumpkin themed Tot Trays are you using?

We linked up to No Time for Flash Cards Linky Party and 1+1+1=1 Tot School Gathering Place!

Wednesday, August 28, 2013

4 great reasons to dye pasta wheels

I love using Kool Aid to dye stuff. I've used it to dye and scent rice and playdough. I was in need of a new sensory idea for the color red, so I let Little Guy pick some pasta from the bulk bins at the grocery store. He chose little wagon wheels.
We divided it into 4 groups and used Kool Aid packets and water. We set them in a bin and put it outside to dry (which didn't take too long in the heat).

Helping Mommy shake it up!

Are you going to help?
The one problem we had was that the noodles dried all stuck together, so we had to spend some time breaking it apart.

Our bin, complete with red tools.

Now for the reasons that you should dye past wheels:

1. It smells yummy!
2. It looks fun to play in. The pasta is not dyed uniformly, giving it a neat look.
3. It is a fun sensory bin.  It's great for scooping, pouring, and hiding your hand in!
4. It doubles as a fine motor activity. Little Guy had a blast threading them on the bamboo skewers.

Adding the wheels so carefully!

Look at that stack.

What have you dyed with Kool Aid?

Saturday, June 15, 2013

Kool Aid Scented Playdough

One area I have started working on with Little Guy is learning his colors.   He knows some, but I want to work and play with colors.  One way we are practicing colors is with play dough, so this week we made some new play dough!  However, this is no ordinary play dough; it is scented and colored with Kool Aid!  I wanted to have the primary colors, so since we already have blue play dough, we needed yellow and red.

The recipe:
1 cup flour
1 cup water
1/4 cup salt
2 tsp. cream of tartar
1 Tbls. vegetable oil
1-2 packets of Kool Aid 

Stir all the ingredients together.  Then cook over medium heat, stirring all the while, until a ball forms.  Take off the heat, put on wax paper to cool, then knead!

To make yellow, we used lemonade.  I used one packet of Kool Aid.  As I was mixing, I could tell the color would not be very vibrant, so I also added a few drops of yellow food coloring.  When it was finished, you could tell it was slight scented, but, as Daddy put it, you can't really smell the lemonade over the play dough smell.

The next day we made red.  I made a half batch of play dough and, to make sure it was well scented, I used 2 packets of strawberry Kool Aid.  The play dough came out a very dark red, and smells so yummy!

Little Guy loves to help stir!

Fresh play dough from the pot.

Knead away!

Hmmm, which color do I want to play with?

I love play dough!
This play dough was a big hit!  Not only did we get some great new colors, but the scents add a little something!  I love when Little Guy plays with it, as it is so good for the muscles in his hands!

What type of play dough have you made lately?

Friday, March 8, 2013

Cheerios and a Pipe Cleaner

So Little Guy and I had to stay home today.  I know, you feel bad for me, don't you!  He was running a fever so we we had an extra day together.  But the thing about little people is that they don't really want to stay in bed when they're sick.  Once they get the medicine that helps them feel better, they're off and running again.

So I was trying to do some activities with Little Guy that would keep him stationary.  One activity we did was threading Cheerios onto a pipe cleaner.  I got it started by putting one Cheerio on and wrapping the pipe cleaner around it so it wouldn't fall off.  Then I gave it to Little Guy to try. 

Getting started and trying on my own.

At first, he was having hard time getting the pipe cleaner through the hole if he was holding both items.  As long as I held the pipe cleaner and kind of directed it, he was able to thread the Cheerios.  After a while, we has able to do some completely on his own!


Mommy helping to hold the pipe cleaner.

Pushing the Cheerio to the bottom.

Look at all those Cheerios that I threaded!

This activity probably held his attention for about 10 to 15 minutes.  He seemed to enjoy it and when he would look at the Cheerios on the pipe cleaner he would get a big smile on his face!

All done!

We are traveling during the next few months, and I think this will be a good activity to take with us. 

What activities do you do with your toddler when they are sick?