Hello! Last week in Tot School we could not pass up the opportunity to focus on E! With Easter upon us and eggs everywhere, it was a great pair! Join us for E is for Egg! Little Guy is 34 months old.
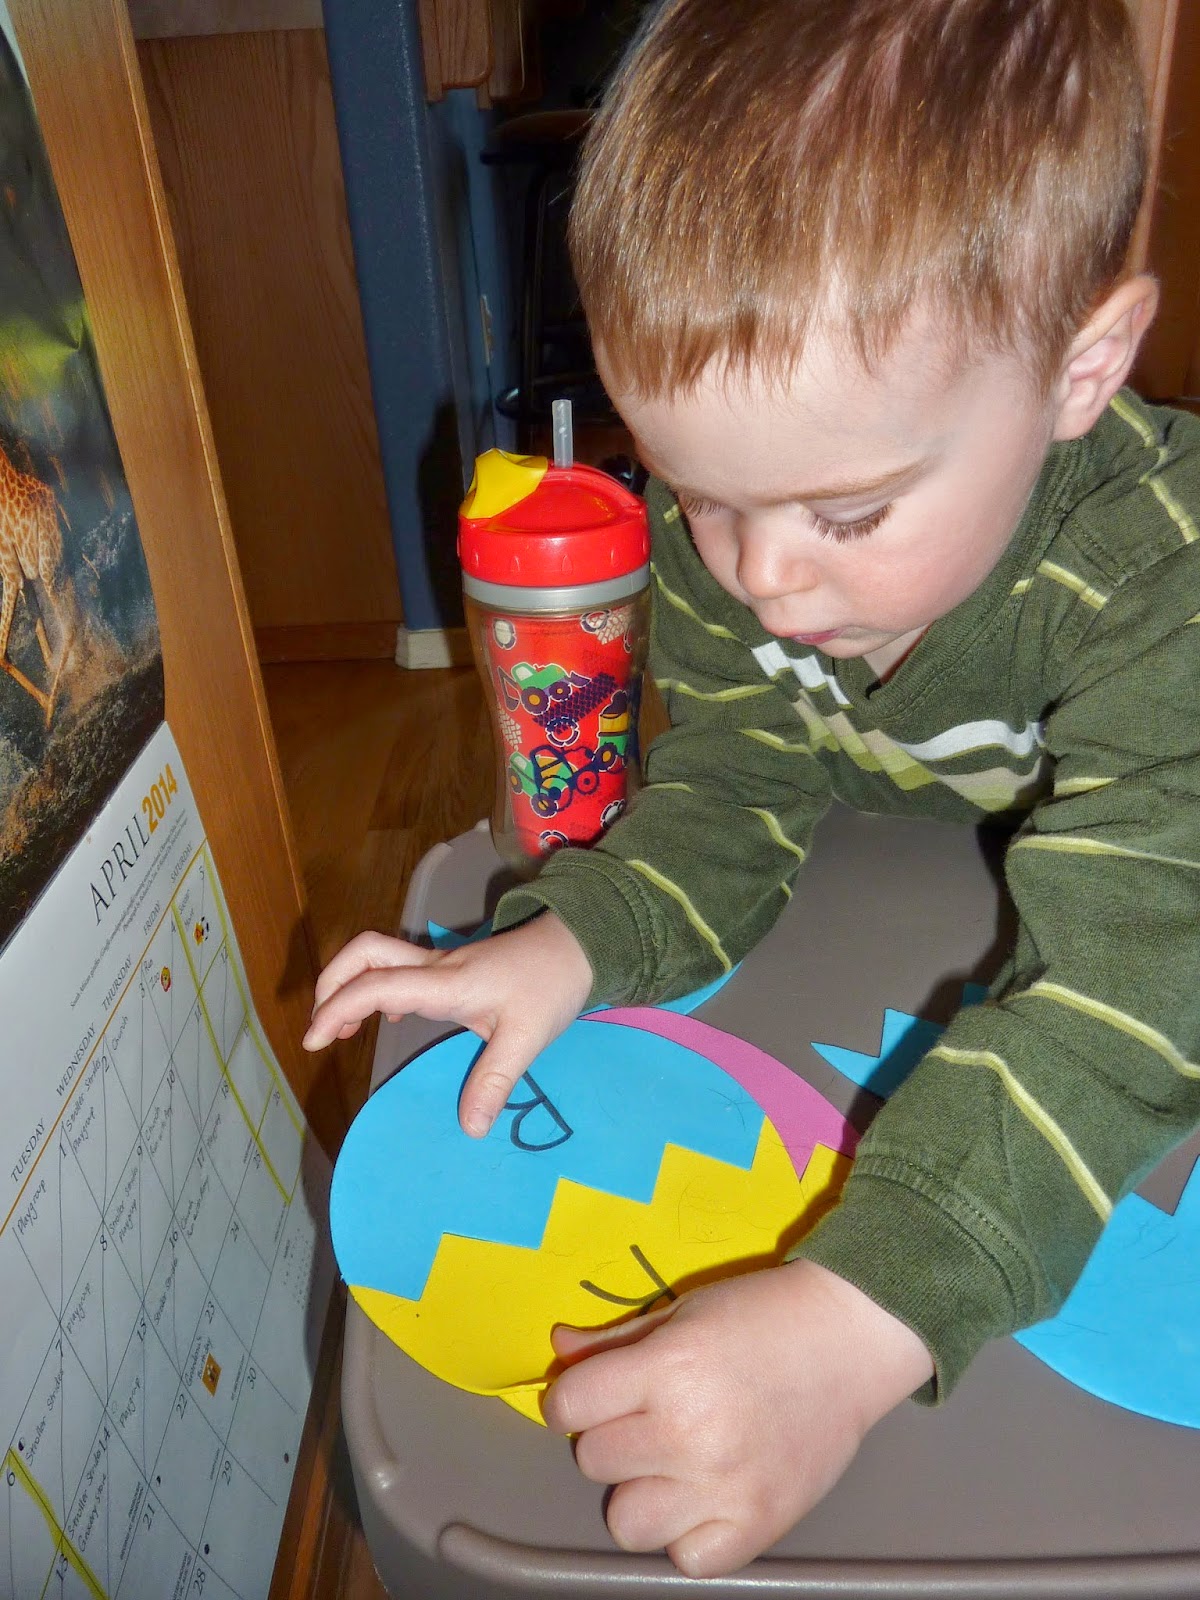
To practice the letter E, we made an E covered in eggs. This is an activity I saw on No Time for Flashcards. Little Guy started by painting a large E. I cut the E out of a cereal box so it would be sturdy. He started painting with a paintbrush, but quickly tired of that. Then I gave him a sponge with a new color, and he added some more details. (He is still not a huge fan of painting.) After allowing it to dry for a few days, he glued on the eggs I had cut out from scrapbook paper.
The next activity practiced one-to-one correspondence. I printed out this egg from the Easter Pack at Gift of Curiosity. I had some little erasers in the shape of stars, so Little Guy had to place one star on each dot on the egg.
This week we had several printables from the Easter Pack at Gift of Curiosity and the Easter Pack at 3 Dinosaurs. The best part of this activity came from Little Guy. After using the dot marker on the counting page from Gift of Curiosity, Little Guy decided he wanted to cut the page apart. It had 4 rectangles on it, so that was fine (plus we did not have any cutting practice this week, so it was a bonus!). Once the numbers were cut apart, I helped Little Guy put them in order. So what started out as a dot page with some counting turned into a number sequencing activity!
The next activity was (by far) his favorite of the week. I had bought these foam eggs from the dollar section in Target a few weeks ago. They were already cut in two pieces. I mixed the pieces up and created a Memory game with them, reviewing some of the letters we have previously worked on in Tot School. Once a match was made, the two pieces would fit together to make an egg. We played this game every day!
The last activity is another from No Time for Flashcards. I put all the letters of the alphabet into plastic eggs. I also wrote the alphabet on a metal cookie sheet (we had magnetic letters so they would stick to the cookie sheet). Little Guy had to open each egg and match the letter inside to the letter on the tray. This was a great way to practice the alphabet, as it not only reviewed the letters we have previously worked on, but it also showed new or unfamiliar letters. Little Guy even surprised me a few times, naming letters like N. This activity was only completed once, and it took a couple of times to get through all the letters.
How's Tot School going for you?
We linked up to the Tot School Gathering Place at 1+1+1=1!
Showing posts with label Sensory idea. Show all posts
Tuesday, April 22, 2014
Wednesday, October 9, 2013
Tot School- Farms Week 1
This week for Tot School we began learning about farms. I thought this would be a fun tine to do this, as we will be going to a farm to get our pumpkins.
We read many books during the week. I had collected books from the library the previous week, so we were all set. Some of the books we read included:
We started a new sensory bin this week. Little Guy helped me get the materials from the grocery store, then I set it up during nap time. The bin had dried split peas, dried split yellow peas, and dried black beans. I added some Habba wooden farm animals, and our farm sensory bin was all set. I also added the letters to spell farm to two sides of the bin to start practicing those letters (I added them later in the week).
As great as I thought the sensory bin with the wooden figures was, Little Guy enjoyed it more with some measuring cups to scoop and pour.
It got even better when he mixed all the materials up!
Little Guy also had some practice with a life skill. We have been working on sweeping up the materials that spill. He is getting better each time.
This week I printed out some materials that I have found through Pinterest. (Visit my farm themed Pinterest board here.) One thing we used is from the Tot Book pack from the blog 1+1+1=1. I used the activities that I thought were best suited to Little Guy.
The tractor sequencing was a great skill. We have been talking about big and little lately, so this was a great extension. I started with three tractors, then after he seemed to know what to do, we added in the last two, for a total of five tractors.
Matching heads and tails was another great activity. This proved to be challenging for Little Guy, but he was able to do it with support.
We have not used the animal matching yet. He has colored one page in the little coloring book. This will be a great color review, and we will continue to use these activities next week.
An activity that I thought would be great fun was Sticky Sheep from Two-Daloo. I traced a sheep outline onto clear contact paper, added an S, and set out a box of white pom-poms. I thought that Little Guy would enjoy adding the pom-poms to the contact paper. Not so much. He enjoyed sticking his hand to the paper, and after being up for 4 days, we now have 3 cotton balls stuck on the sheep (we found the cotton balls stuck better than the pop-poms).
The best use of this project was when Little Guy spilled his pom-poms and got more practice sweeping.
One last activity we did this week was a discovery bottle. I used some of the materials from our sensory bin and put them in a water bottle along with the foam letters F, A, R, and M. Little Guy seemed to enjoy shaking the bottle!
This was a fun first week of learning about farms. We will continue this theme next week.
What farm activities have you done?
We linked up to No Time for Flash Cards Kids Activities Linky Party!
We linked up to the Tot School Gathering Place at 1+1+1=1 (I was featured from last week!).
We read many books during the week. I had collected books from the library the previous week, so we were all set. Some of the books we read included:
- Big Red Barn by Margaret Wise Brown
- Little Scholastic Petting Farm
- Biscuit's Day at the Farm by Alyssa Satin Capucilli
- Tractors by Connor Dayton
- Peek-a-Moo! by Marie Torres Cimarusti (This is Little Guy's favorite!)
- A Visit to the Farm by B.A. Hoena
- My Farm Friends by Wendell Minor
We started a new sensory bin this week. Little Guy helped me get the materials from the grocery store, then I set it up during nap time. The bin had dried split peas, dried split yellow peas, and dried black beans. I added some Habba wooden farm animals, and our farm sensory bin was all set. I also added the letters to spell farm to two sides of the bin to start practicing those letters (I added them later in the week).
Our farm sensory bin. |
Woah, checking it out. |
I like the measuring cups! |
Mix, mix, mix! |
Sweeping them into a little pile. |
Pushing them into the dustpan. |
This week I printed out some materials that I have found through Pinterest. (Visit my farm themed Pinterest board here.) One thing we used is from the Tot Book pack from the blog 1+1+1=1. I used the activities that I thought were best suited to Little Guy.
Little Guy's farm Tot Pack. |
Carefully considering which is the smallest tractor. |
Putting them in order. |
Putting the cow together. |
An activity that I thought would be great fun was Sticky Sheep from Two-Daloo. I traced a sheep outline onto clear contact paper, added an S, and set out a box of white pom-poms. I thought that Little Guy would enjoy adding the pom-poms to the contact paper. Not so much. He enjoyed sticking his hand to the paper, and after being up for 4 days, we now have 3 cotton balls stuck on the sheep (we found the cotton balls stuck better than the pop-poms).
The best use of this project was when Little Guy spilled his pom-poms and got more practice sweeping.
Making a little pile. |
Using his big muscles to shake! |
I see the letters! |
What farm activities have you done?
We linked up to No Time for Flash Cards Kids Activities Linky Party!
We linked up to the Tot School Gathering Place at 1+1+1=1 (I was featured from last week!).
Saturday, August 31, 2013
Blue Day
As I have mentioned in previous posts, one thing I am working on with Little Guy is colors. I was inspired by a series of posts on Play Create Explore that focus on a color of the week. While I was not quite ready to dedicate an entire week to each color, I though about what activities I could do in a day to practice a color.
The first color we practiced was blue. Our blue activities included making blue scented rice for a new sensory bin, painting with blue paint, using blue markers, wearing the color blue, and playing with blue play dough.
We made blue rice, using this recipe from Growing a Jeweled Rose and blue Kool Aid! We had a lot of fun with it!
Since Little Guy had still been enjoying airplanes, I thought we would paint some. I have these large plastic stencils that we used.
What I learned was that there was too much for just one day! We did this back in July (sorry it's late!), but did not get everything done that I wanted! (We never even got out the play dough and I had a few more ideas that I did not even mention.) After some reflection on my goals for Little Guy, we will do a couple of colors a week. Stay tuned for more color activities!
The first color we practiced was blue. Our blue activities included making blue scented rice for a new sensory bin, painting with blue paint, using blue markers, wearing the color blue, and playing with blue play dough.
We made blue rice, using this recipe from Growing a Jeweled Rose and blue Kool Aid! We had a lot of fun with it!
Since Little Guy had still been enjoying airplanes, I thought we would paint some. I have these large plastic stencils that we used.
We started out using s sponge... |
but it soon got on our hands! |
Finger painting! |
Our finished art. |
Wednesday, August 28, 2013
4 great reasons to dye pasta wheels
I love using Kool Aid to dye stuff. I've used it to dye and scent rice and playdough. I was in need of a new sensory idea for the color red, so I let Little Guy pick some pasta from the bulk bins at the grocery store. He chose little wagon wheels.
We divided it into 4 groups and used Kool Aid packets and water. We set them in a bin and put it outside to dry (which didn't take too long in the heat).
The one problem we had was that the noodles dried all stuck together, so we had to spend some time breaking it apart.
Helping Mommy shake it up! |
Are you going to help? |
Our bin, complete with red tools. |
Now for the reasons that you should dye past wheels:
1. It smells yummy!
1. It smells yummy!
2. It looks fun to play in. The pasta is not dyed uniformly, giving it a neat look.
3. It is a fun sensory bin. It's great for scooping, pouring, and hiding your hand in!
4. It doubles as a fine motor activity. Little Guy had a blast threading them on the bamboo skewers.
Adding the wheels so carefully! |
Look at that stack. |
What have you dyed with Kool Aid?
Tuesday, July 2, 2013
Another idea for Shaving Cream: Shaving Cream and Trucks
Since Little Guy really enjoyed the shaving cream, I wanted to get it out for us to use again. This time we went outside, as I feared it might be messier because we used the trucks to drive though the shaving cream.
We started out with shaving cream on the table. Little Guy seemed a little tentative about the shaving cream. I was nearby to encourage him. This activity ended up being a cooperative effort with both us.
To help him get going, I started to smear the shaving cream around. This got him going, too! We have been talking about colors lately, so I added some food coloring to smear in. We added yellow first, then a few drops of blue. Although it is hard to see, the food coloring did a nice job and after it was all mixed in, we had a pretty sea green color.
Then Little Guy was a little more interested in pushing around the trucks.
The last thing we did was to wash the trucks in the water table. He would take a truck over, swish it around, then put it back on the table. Then he'd grab another truck, and repeat. I think this was his favorite part, as he kept rinsing time and time again.
While Little Guy was rinsing his trucks, I cleaned the rest of the shaving cream off the table. The only other cleanup was to empty and rinse the water table and trucks, as the shaving cream left a film.
One recommendation is to have a damp towel outside with you. It was nice for me to wipe off my hands, and Little Guy used it to wipe the shaving cream that was on his arms.
How have you played with shaving cream lately?
We started out with shaving cream on the table. Little Guy seemed a little tentative about the shaving cream. I was nearby to encourage him. This activity ended up being a cooperative effort with both us.
Are you sure I can put my truck in there? |
It's in! |
Time to smear! |
Moving the trucks around! |
Time to wash! |
One recommendation is to have a damp towel outside with you. It was nice for me to wipe off my hands, and Little Guy used it to wipe the shaving cream that was on his arms.
How have you played with shaving cream lately?
Saturday, June 15, 2013
Kool Aid Scented Playdough
One area I have started working on with Little Guy is learning his colors. He knows some, but I want to work and play with colors. One way we are practicing colors is with play dough, so this week we made some new play dough! However, this is no ordinary play dough; it is scented and colored with Kool Aid! I wanted to have the primary colors, so since we already have blue play dough, we needed yellow and red.
The recipe:
To make yellow, we used lemonade. I used one packet of Kool Aid. As I was mixing, I could tell the color would not be very vibrant, so I also added a few drops of yellow food coloring. When it was finished, you could tell it was slight scented, but, as Daddy put it, you can't really smell the lemonade over the play dough smell.
The next day we made red. I made a half batch of play dough and, to make sure it was well scented, I used 2 packets of strawberry Kool Aid. The play dough came out a very dark red, and smells so yummy!
This play dough was a big hit! Not only did we get some great new colors, but the scents add a little something! I love when Little Guy plays with it, as it is so good for the muscles in his hands!
What type of play dough have you made lately?
The recipe:
1 cup flour
1 cup water
1/4 cup salt
2 tsp. cream of tartar
1 Tbls. vegetable oil
1-2 packets of Kool Aid
Stir all the ingredients together. Then cook over medium heat, stirring all the while, until a ball forms. Take off the heat, put on wax paper to cool, then knead!
To make yellow, we used lemonade. I used one packet of Kool Aid. As I was mixing, I could tell the color would not be very vibrant, so I also added a few drops of yellow food coloring. When it was finished, you could tell it was slight scented, but, as Daddy put it, you can't really smell the lemonade over the play dough smell.
The next day we made red. I made a half batch of play dough and, to make sure it was well scented, I used 2 packets of strawberry Kool Aid. The play dough came out a very dark red, and smells so yummy!
Little Guy loves to help stir! |
Fresh play dough from the pot. |
Knead away! |
Hmmm, which color do I want to play with? |
I love play dough! |
What type of play dough have you made lately?
Subscribe to:
Posts (Atom)